Overview
As much as modern browsers currently provide instant translation to users, it can be useful to have this feature directly in the website navigation bar.
In this article we will show you how to do this with a free plugin that is very simple to use. The famous GTranslate.
Installing Plugins
From Dashboard go to Plugins > Add New, look for GTranslate, install and activate it.
Also install and activate the Shortcode in Menus plugin. It will be useful to add the “Language Selector” in the navigation bar.
Configuring Gtranslate
From Dashboard go to Settings > GTranslate and configure as desired. Where it says “Widget look” we recommend that you select “Flags”. Check the checkboxes for the languages you need and save the settings.
If you need more information see the plugin support page.
Adding a Language Selector
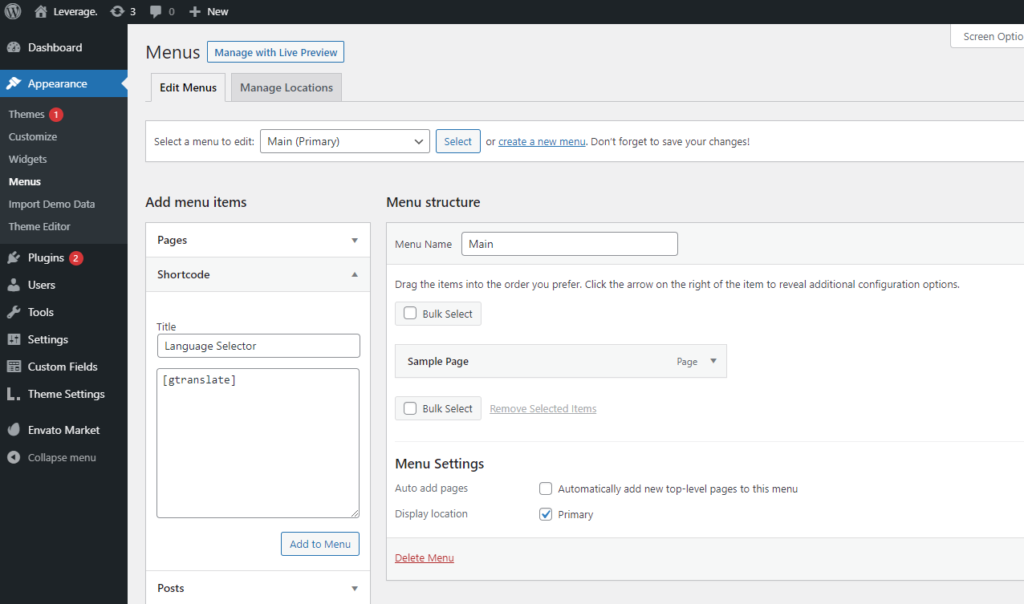
From Dashboard go to Appearance > Menu and add a menu item of type “Shortcode”, in it type a title and in the larger field type [gtranslate]. Save the menu and it will appear on your website.

Styling the flags
To get a better appearance of the flags, we have prepared the Custom CSS that can be useful.
From Dashboard go to Theme Settings > Advanced and add it to Custom CSS:
.navbar-nav .glink {
  margin: 0 5px;
}

.menu .menu-item-object-gs_sim {
  display: flex;
  padding: 15px 0;
}
Conclusion
We hope this helps somehow users of the [Leverage] theme and also other themes to get multi-lingual sites incredibly easily.
If you have any questions or suggestions send us a message to adm.codings@gmail.com
Greetings 🙂
.